
AI image generation has become quite the hype. Experimenting with models and prompts has the potential to be fun, addictive and can spark unexpected creativity. However, if you are not that tech-savvy, you are limited to the free or paid options of the many providers available online. Additionally, if you want to run your own instance on your computer, you have to have a buffed graphics card. But even with decent consumer hardware, it can take more than 30 seconds to generate a single 512x512 pixel sized image. To speed things up or get access to capable hardware in the first place, you can turn to GPU instances of popular cloud providers. In this blog article, we will explore how to set up a potent GPU instance on an european cloud provider.
Prerequisites 🔗
You should have a general understanding of unix and know how to use a terminal to follow the tutorial.
What is Stable Diffusion? 🔗
Stable diffusion is a way of creating realistic and artistic images using computer algorithms. In simple terms, it is a computer program that can take text or image input and transform the input into something else.
This process uses a special mathematical technique called a neural network. A neural network is like a complex equation that can learn from examples. The neural network is trained on a large dataset of images. That’s how it can learn to create new realistic looking, high-quality images. Even images that are completely different from anything that you have seen before.
Overall, Stable Diffusion is a very powerful and innovative technique. It has the potential to transform the way we create and interact with visual content.
Into the cloud 🔗
Turns out it is not that easy to get you up and running. Amazon Web Services (AWS) wouldn’t even give me an GPU instance, because I didn’t have a business case. But I guess if you get creative you can manage that. Google was a bit more generous with their GPU instances. However, it was not easy to set up the AUTOMATIC1111 GUI on a GCP instance. You have to install a load of python stuff yourself and stumble from error message to error message, compiling and googling involved. After I had everything up and running, I was also a bit disappointed with the performance. The ssh connection seems to be sluggish and the image generation was not as fast as I hoped for (roughly 15 seconds with default settings). So I gave an european cloud provider a shot: Scaleway. With their instance I almost instantly succeeded and started to generate images in about three to five seconds (default settings). Note, that these generation times depend heavily on the settings you select. The fastest generation time produces maybe not the best looking images.
Launch an instance 🔗
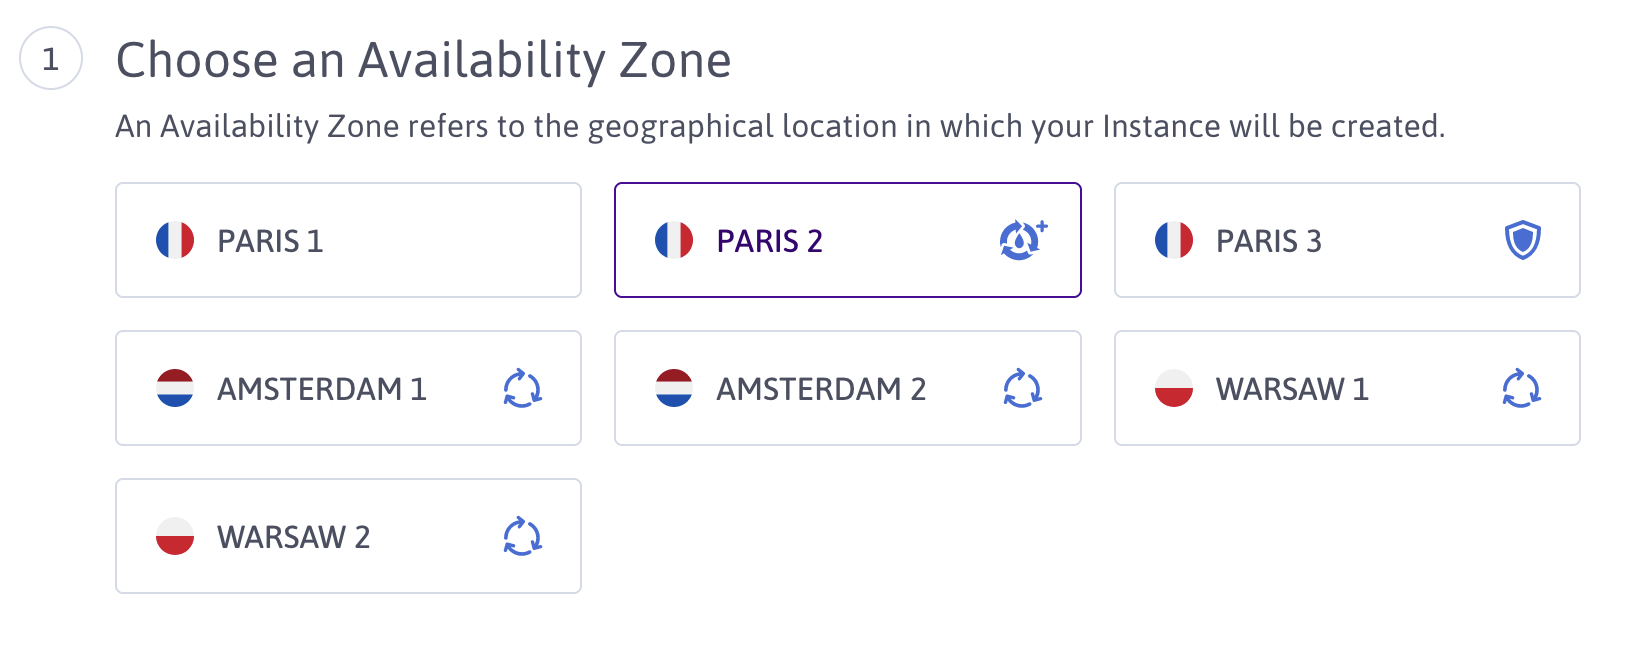
Once you’ve created an account, go to compute, instances and select Paris2 as your Availability Zone.
- On point 1: Once you’ve selected GPU, Scaleway will ask you to verify your account to increase the GPU instance limit to 1.
This is a online process and only takes about five minutes to complete. Unfortunately it is mandatory for the limit increase.
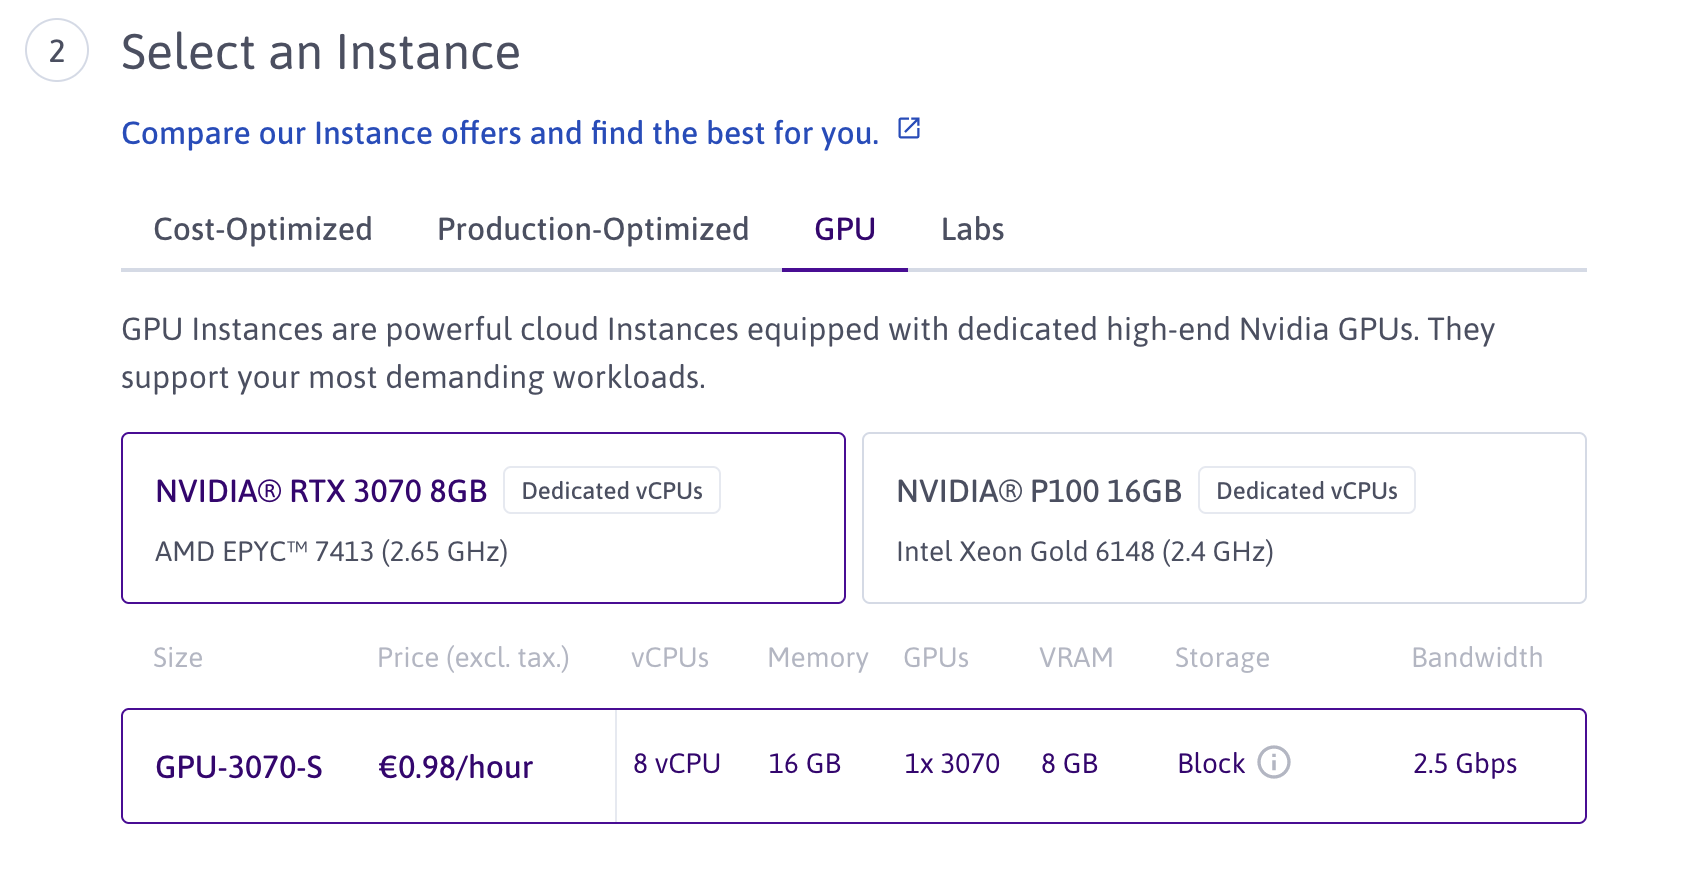
After this is done, select GPU and the NVIDIA RTX 3070 instance.
- On point 2: Select GPU Instance. Make sure to also click on the instance size below (just one option at the moment)
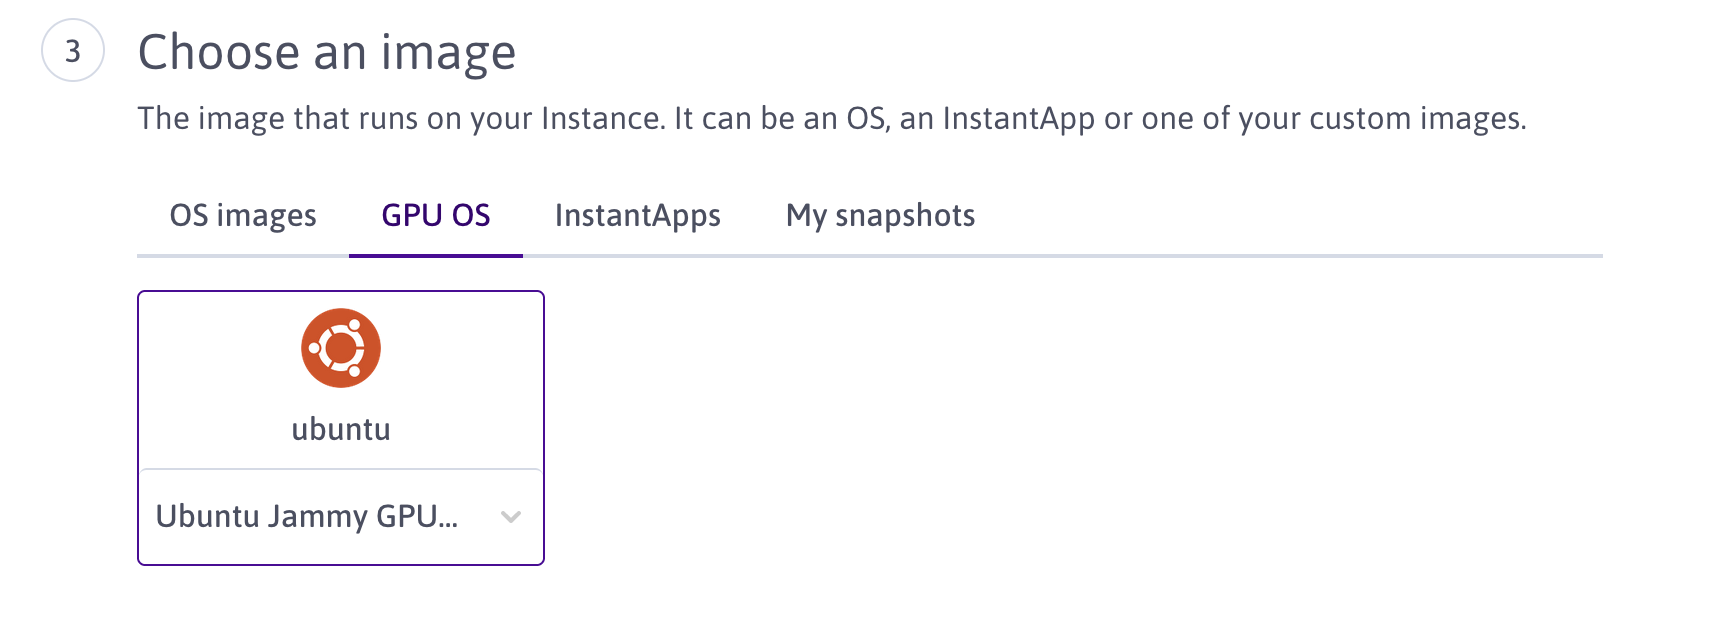
- On point 3: Select GPU OS and the only available Ubuntu option, which already has the necessary
drivers and the right Python version installed.
- On point 4: you should add at least 125 GB of volume storage. The models to run Stable Diffusion are big.
- On point 5: Enter an arbitrary name, no tags needed.
- On Point 6: Either generate a new ssh key, or add and existing one. It is required to access the instance. Scaleway offers a tutorial how to do so when you click on “Add ssh key”.
- On Point 7 you can review the expected costs (roughly 1€ per hour, yep, its hefty).
After the instance is running, you can connect via shell with the following command:
ssh root@<instance-ip>
Setting up the instance 🔗
apt update && apt upgrade # update package manager
apt install python3-pip # install pip
apt install python3.10-venv # install python virtual environment
apt install ffmpeg libsm6 libxext6  -y # some torch requirements
adduser <yourDesiredUsername> # the webui can't be run as root
It might be necessary to restart the instance once. This should set up the requirements for the webUi. Now, let’s try to install it:
su <yourDesiredUsername> # switch user
cd ~ # switch to home directory
mkdir sd # make directory
cd sd
git clone https://github.com/AUTOMATIC1111/stable-diffusion-webui
So far so good, now we need some models. The general process is the following:
- You can get models at huggingface or civitai.
- Copy the download link
- Download the desired model:
  cd stable-diffusion-webui/models/Stable-diffusion
  # wget <download-link> --content-disposition, for example:
  wget https://civitai.com/api/download/models/15236 --content-disposition
Great. Now let’s try to run the WebUI:
cd ~/sd/stable-diffusion-webui # go to stable-diffusion-webui root
./webui.sh
Fingers crossed, you should be up and running. Ok but how to access the UI? For this, we need to stop the UI again and exit the session for now: CTRL + C
exit # back to root user
exit # quit ssh session
Tunneling through 🔗
Now, to access the UI like it would be running locally, we need to create a SSH tunnel with port forwarding. A SSH tunnel is like a secret connection that you can use to send encrypted messages. When you initiate the SSH tunnel with port forwarding, it opens up a secure connection between your computer and the server. Any data that you send through the tunnel on your computer will be securely transported to the server. It’s like creating a direct pathway between your computer and the server, even though they are physically separate.
We want to connect our local port 7680 to our remote server at the same port (since this is where the UI server is listening):
ssh -L 7860:localhost:7860 root@<YourServerIPAddress>
Neat, now we are connected to the server again. Time to start the WebUI:
su <YourUser>
cd ~/sd/stable-diffusion-webui/
./webui.sh
When the UI is running, go to your browser and type http://localhost:7860. You should see the UI. Happy generating!
Getting the images 🔗
That’s great, you say, but how do I get the images from the server? Well, you zip the whole folder and secure copy (scp) to your machine each time you want to download the images. Secure Copy (SCP) is a method of securely transferring files between computers over a network. Just like its name suggests, SCP ensures that your files are copied safely and securely, protecting them from unauthorized access or tampering.
# on the server when in the outputs/txt2img-images folder, and want to get all images from 2023-03-10
tar -zcvf images.tar.gz 2023-03-10/

# switch to a local terminal and copy to your machine in the current directory
scp root@<YourServerIPAddress>:/home/<YourUser>/stable-diffusion-webui/outputs/txt2img-images/images.tar.gz ./

# untar archive in current dir
tar -zxvf images.tar.gz